Generate Journal Entries for Bexio
Once you have run your payroll, you can generate a journal entry which you can book into Bexio.
- To do this simply log into Bexio - https://idp.bexio.com/login
- Select "Settings" → "All Settings" → "Accounting" → "Chart of Accounts Financial Accounting",

- Select "Chart of Accounts Financial Accounting",

- You can extract your Chart of Accounts by clicking the excel icon.

- Go back to Earny
- Click Account on left hand navigation

- Click Account on left hand navigation
- Click on Import Chart of Accounts to start with a base of accounts.

- You can now edit the number and names of each account matching it to the account have in your Bexio Chart of Accounts.
- For example if I want to change the Account Name and Number for AHV, I would click Edit for 2100 Debtors / AHV/IV/EO - Old Age Contribution and change the number from 2100 to whatever number is in my Bexio account and change name to whatever name is in my Bexio Account.
- Once done hit Save.

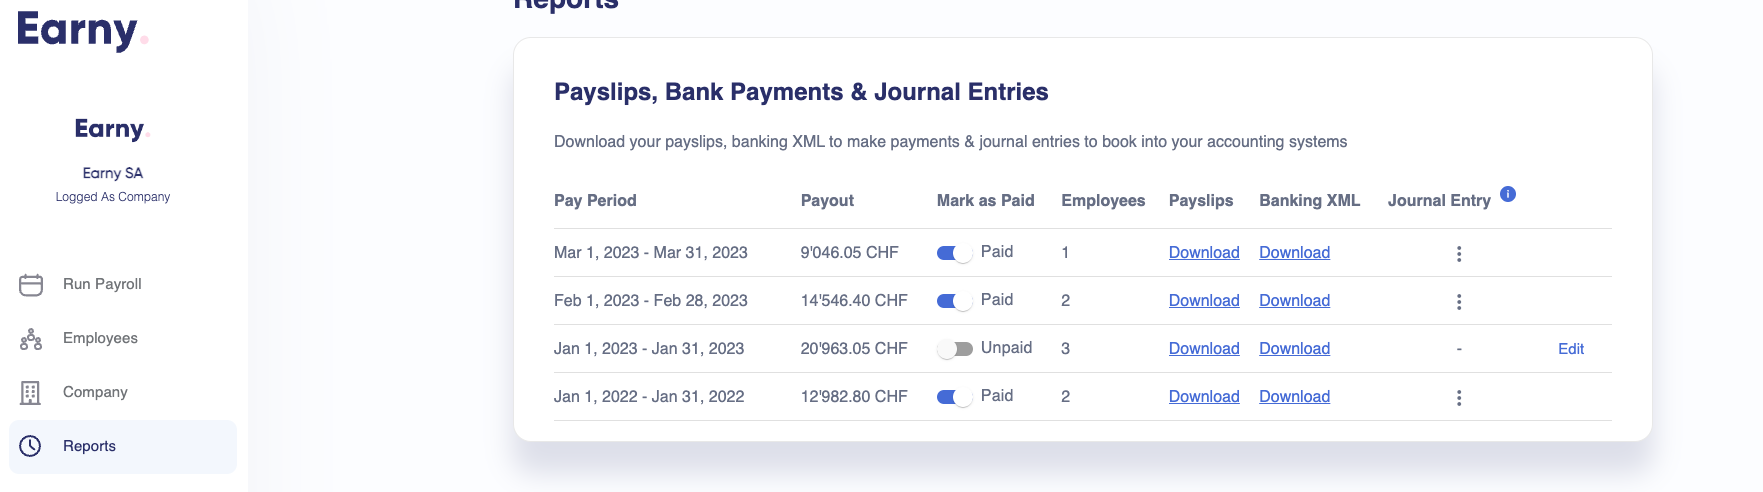
- Once you've updated all your accounts, you can go to the Reports Section
- Find the month you want to create journal entries
- Toggle Paid for the month you want to create journal entries for.
- There will be two download options:
- Choose the 2nd, "Download Journal entry COA" if you have specified a chart of accounts that are specific to your account, we will generate the entries based on those specific chart of accounts.
- For details on how to set up your specific chart of accounts, please visit "How to set up my company specific chart of accounts"
- You will get an excel extract.
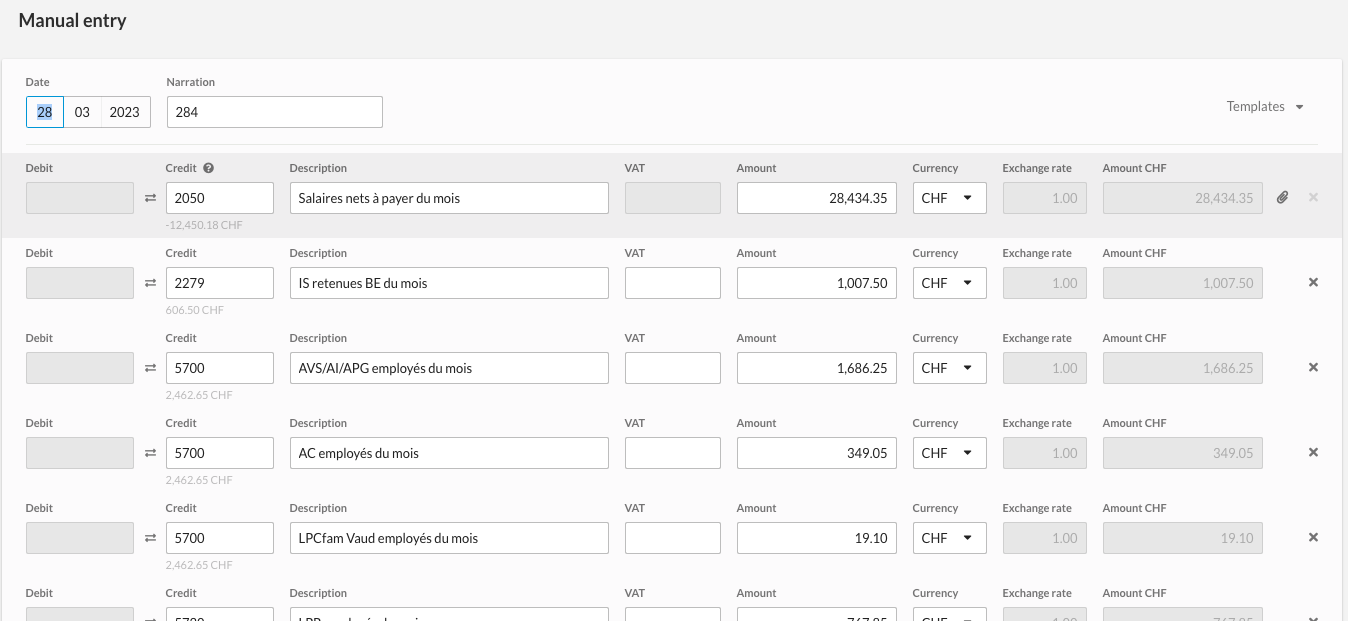
- When accounting journal has been created, you can go back into Bexio and Select Accounting followed by Reports and select tab Journal
- Add each entry into your journal as it is outlined in the journal entry from Earny
 This will automatically generate a journal entry file which you can download.


- Hit Save as Template so you can reuse this journal template in the future.
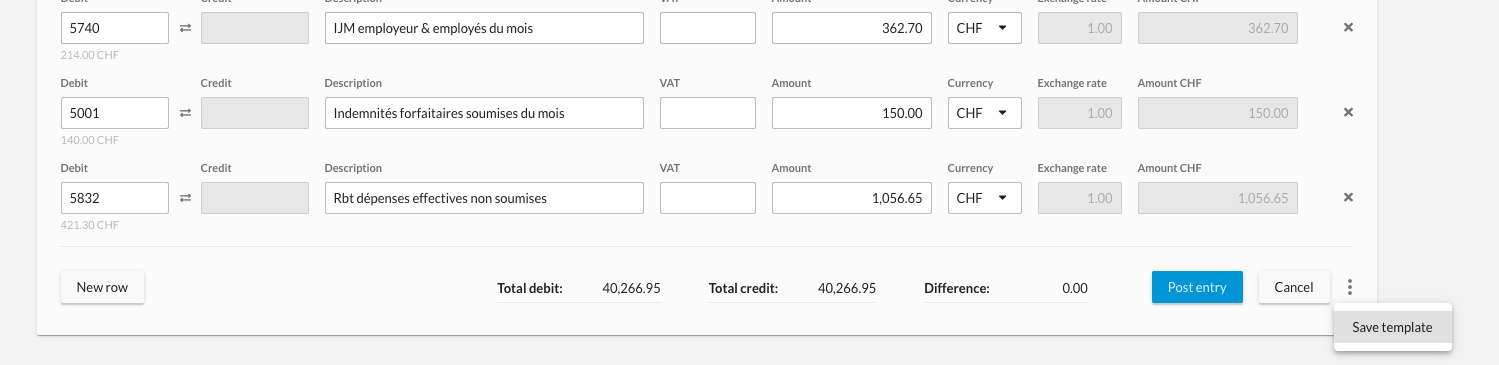
- Once done hit Post Entry.
- Next month simply access your save template by Click Templates on the left hand side.
